This is my third post in a series of entry-level posts, as suggested by Tim Ford (b|l|t) in this challenge.
I have not set any scope for the topics of my, at least, twelve (12) posts in this blog category of mine, but I can assure, it’ll be focused on SQL Server stuff. This time it’s going to be about how to synchronize Analysis Services (SSAS) databases, across servers, using a build in feature. I was contemplating not having this post as an entry-level item, but decided so, simply because I would have liked to know about the feature long before I found out it existed.
Preface
Before we get into the meat of this technique, it might be helpful to know a little bit about when to leverage the benefits.
In my experience, the most frequent way to use this feature, is to use it to copy a database from a processing instance to one or more query server instances. The main benefit of this approach is, that the end users does not feel the impact of the cube/database processing, nor do they feel the relatively heavy impact of a database restore, which would be another way of copying a cube.
Another use of this feature, is to merge databases from multiple processing instances, into a single query instance. This is not something I have come across, other than in writing, but it should be applicable (at least according to Microsoft).
Depending on your environment, you may be facing different obstacles, and as usual, there are no silver bullets. This also goes for database synchronization, which means copying the entire database, every single time. It’s easy to identify the first show stopper, that being the size. When a database/cube becomes too big, you may want to look for alternatives. So let’s look at the alternatives.
Backup/Restore: Target Database cannot be queried during restore process.
The suggested work around for this is to have two identical databases on the target server, only difference being the name. Restore to alternate name, and once restore is complete, rename the current and the newly restored.
Detach/Attach: You have to detach the target database, before you can attach the new version.
As with backup/restore, is would be possible to have a second replica, attach this and do the renaming as described above.
Both of these approaches will require you to allocate at least two times the disk amount, since you must have two copies side-by-side.
Robocopy: SSAS needs stop/restart to release lock on files.
If your SSAS instance is located on an Azure VM, you should be able to work around this issue by having two servers, one cold standby. You would then fire up the cold stand-by to replicate the changes, and after successful update, redirect queries using a load balancer to the new updated server. Once there are no active queries on the “old”, you can shut that down.
Synchronize: You need to copy the full database, every time
The draw back of this approach is obviously the fact that you need to move all of the data across the lines, every single time. There is no circumventing this.
There are no guideline from Microsoft on size limit, other than, when it takes too long, the database is too big – probably 🙂
Prerequisites
First of all, there is a set of prerequisites, in order for the synchronization to work.
- User must be a member of the Analysis Services server administrator role on the Target server.
- User must have Full Control permissions on the Source database.
- TCP port 2383 must be open on both servers to allow remote connections between default instances.
- Both the Source and Target server must be the same version.
- See Synchronization Error here

- Edition needs to be either Enterprise, Developer, or Business Intelligence.
- Server mode must be identical on the two, either Tabular/Tabular or Multidimensional/Multidimensional.

Manual Synchronization (Wizard)
Using SQL Server Management Studio (SSMS) it’s possible to do a manual synchronization of any given database. Please note the prerequisites above before commencing. In SSMS you begin by connecting to the target server, the server where you need the database synchronized to. Once connected, right-click the database node and you will be presented with a context menu with a Synchronize item. See figure below:
 Note that in the screen dump, there are no databases on the target server CMS01\SQL2016Prod but one on the CMS01\SQL2016 instance called Test Database. This is the database we are going to synchronize.
Once you click the Synchronize item, the synchronization wizard will kick of with a welcome message. You can skip at will 😉

The next screen lets you select the source of the synchronization. The target is prelected, as the server on which you invoked the wizard. In this case, I select the CMS01\SQL2016 instance and the Test Database to be the source.
 When clicking next, you will be presented with a screen that allows you to select the location you want to synchronize to. Notice, that the folders available, are the folders set in the SSAS configuration attribute AllowedBrowsingFolders on the target server.

Also note, that the property is categorized as Advanced, so you need to check Show Advanced (All) Properties.
Back to the Wizard. If you need to specify a different location on the target server, this is where you can.
 In my case, both folders display: (default) – which means I haven’t set up anything special.
Next you are going to be prompted to choose which security settings to synchronize. You can Copy All, Skip Membership or Ignore All. And then for some odd reason, the choice on whether to compress during Synchronization or not is put into this screen as well…
If you Copy All, you will replace whatever security settings you have on the target server. This includes Roles, members and Permissions.
Skip Membership copies all of the Roles including Permissions, but not the Members. This is a tricky one, as you will, no doubt, have a gap (outage) from when the new Roles are in place, until members have been assigned (for new roles). Existing roles will keep the members already in place.
Finally you can Ignore All, which leaves the existing Roles and Members unaffected.
The only reason I see to uncheck the Use compression… option would be if you are sourcing from a database that is hosting users. In that case, you may want to not compress, in order to leave as small in imprint on the source server as possible. You will be consuming clock cycles for the compression which will likely impact the end user experience.
 In this case I have opted to just Copy All.
This leads to the last screen where you are prompted to select something – Do you want to synchronize now or Save it to a script?
 We go with the Synchronize Now option and are presented with a Summary of our choices, just to make sure.
When we click Finish, we are presented with the process and end result in a new window.

Until it’s finished, you can actually Stop the process.
Let’s see the new Database in our “production” (CMS01\SQL2016Prod) environment:

Voila, the database has been synchronized!
Next up automation.
SQL Agent
All of the above steps can be automated using the SQL Agent and an XMLA script. The script can, as earlier stated, be generated during the Wizard process. One such Script would look like this:
<Synchronize xmlns:xsi="http://www.w3.org/2001/XMLSchema-instance" xmlns:xsd="http://www.w3.org/2001/XMLSchema" xmlns="http://schemas.microsoft.com/analysisservices/2003/engine">
  <Source>
    <ConnectionString>Provider=MSOLAP.7;Data Source=.\SQL2016;Integrated Security=SSPI;Initial Catalog=Test Database</ConnectionString>
    <Object>
      <DatabaseID>Test Database</DatabaseID>
    </Object>
  </Source>
  <SynchronizeSecurity>CopyAll</SynchronizeSecurity>
  <ApplyCompression>true</ApplyCompression>
</Synchronize>
This Script is easily integrated with the SQL Agent. And setting up the SQL Agent is, in my experience, the hardest part.
In order for the SQL Agent job to run independently from the user account used for the SQL Agent Service, we need to setup both Credentials and a Proxy. The Proxy uses the Credentials to execute the job, more specifically, the individual steps in the job. This means, we can setup different Credentials/Proxy for different steps in our job, in case we need to synchronize to different environments.
Setting up the Credentials is pretty straight forward. In SSMS, connect to the server where you want your SQL Agent to run the job. Expand Server->Security, and then right-click on Credentials. This will offer you the option to create a new Credential.

A credential is a record that contains the authentication information (credentials) required to connect to a resource outside SQL Server – More here.
You then give the Credentials a meaningful name, assign the desired account and password and click OK.
Encryption can be added as well, if you have such a provider.

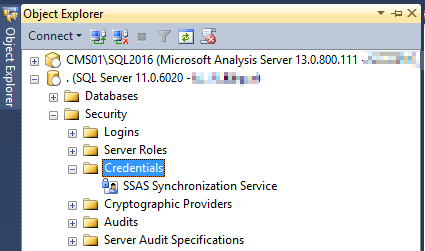
I have named my Credentials the SSAS Synchronization Service. Later I will be able to pick this particular Credentials in my Proxy,
When the dialog is closed, we see the Credentials appear in the Credentials collection in SSMS.
 Having the Credentials ready, we can move on to create the Proxy that the SQL Agent Job uses.
Expand the SQL Agent, and right-click Proxies. This allows you to create a new.
 Setting up the Proxy is also very easy. Assign a name, Assign the proper Credentials and check the proper sub-system, in this case SQL Server Analysis Services Command .
 Maybe a bit misleading, but I have named both the Credentials and the Proxy the same. Once the Proxy is finished, it’ll appear in the Proxy collection in SSMS.
By now, we are ready to create our actual SQL Agent Job. We do so by right-clicking the Job folder under the SQL Agent node in SSMS
 We are then prompted to assign a name for the Job, and please do pick something meaningful and scaleable. I’ve seen tons of servers flooded with jobs named almost the same, only to differ in the post fix number. Bad Developer, No Twinkie!
 Obviously you would also fill in the description, as the above title should be accompanied by some more detail
The actual tasks in a SQL Agent Job is hidden in the steps assigned. And for this demo, we only need to assign one single step to produce the desired outcome. Select Steps in the left hand menu, and click the New button.

This will bring you to the actual meat and bone of the Job task. In here, you fill in details such as Step name, the Type of the step, under which Proxy the step should be use (if none defined, SQL Agent will be selected).

By selecting a SQL Server Analysis Services Command Type, the Server and Command textboxes appear, and we can fill in our details for those and our Step is all set to go.

We can now add a Schedule, Alerts and Notifications to the Job, but I will let you play with that on your own. For now I will just hit OK and see that my Job gets created.
 When right-clicking the newly created Job, I can choose to Start Job at Step – If more steps were present, I would be able to select a specific one. Since I only have one, the Job just kicks off.
 If the Green Success check mark fails to show, I bet you it has to do with the Proxy/Credentials. Please do re-check again with the requirements for synchronizing a cube, as stated initially in this blog post. Most often I found it’s down to lack of privileges.
Round-Up
I hope this Synchronization walk-through has given you insight into how to move your data around, with out having to port code (XMLA) from one server to another, rename the Cube key in the script in order to run it – or whatever odd way you found, to have a copy in production (or dev). I certainly advocate for using this feature over many other home-grown solutions, as it’s maintainable, to some degree controlable and it’s proven technology.
Gemino reference, for those who didn’t catch on…
![]()