This is my second post i a series of entry-level posts, as suggested by Tim Ford (b|l|t) in this challenge.
I have not set any scope for the topics of my, at least, twelve (12) posts in this new blog category of mine, but I can assure, it’ll be focused on SQL Server stuff. This one is going to be about how to extend Analysis Services (SSAS) with your own custom code.
The example in this post will be the well known Hello World example in the context of SSAS, and I trust this will illustrate the possibilities with this technique well enough, for you to apply your own solution, to your challenges.
Creating the Custom Code
First of all, we have to create the custom code. This can be done with the free tool Visual Studio (download). To get going, we create a new project [Ctrl]+[Shift]+[N] or via the dialog below:

In the next dialog, we then select both which programming language to use for the project and also what kind of output the compiler will provide. I select a Class Library output, programmed in Visual C#, in this example. This will provide us with an assembly, which we can import directly into the SSAS Server.

First a couple of house keeping routines. Even though this is just a tiny example, there’s no need to not do the right thing. Naming conventions should be agreed on, before diving into the code.
We begin by renaming the entire solution:

I name this one ‘CustomAssembly’
Next we rename the project:

Finally we need to rename the Class File:
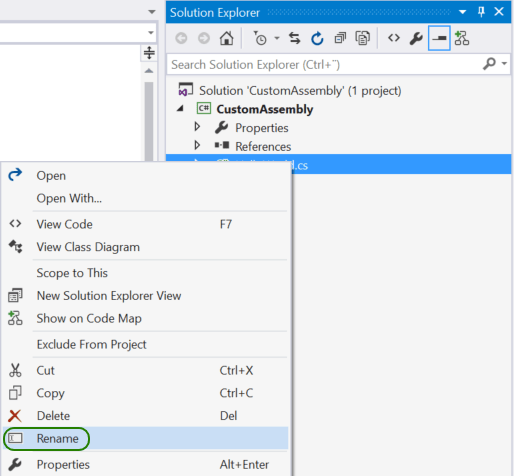 I have named mine HelloWorld.cs. With this in order, we are now ready to implement our custom code.
Of course the code in this example is simple, but I trust you will be able to spot the potential of the technique.
The Class implementation looks as follows:
using System;
using System.Collections.Generic;
using System.Linq;
using System.Text;
using System.Threading.Tasks;

namespace CustomAssembly
{
    public static class HelloWorld
    {
        public static string GetValue()
        {
            return "Hello World";
        }
    }
}
As I said, very simple. This function only returns the same text, for every call.
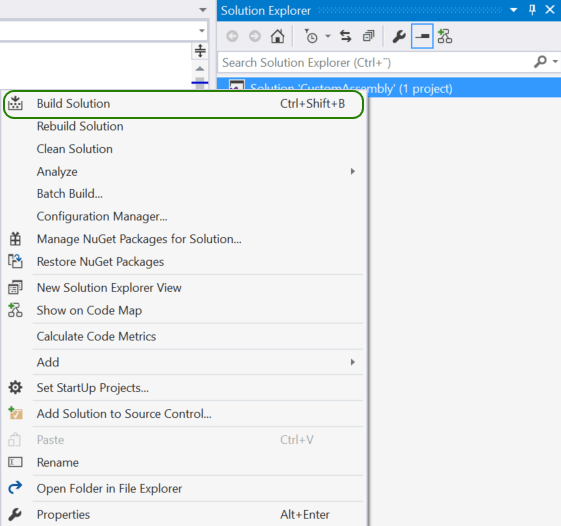
In order for us to leverage this via SSAS, we need an assembly to register. We now just need to successfully build the project in Visual Studio and we are off.
Right click the Solution name in the top of the Solution Explorer ([Ctrl]+[Alt]+[L]) or press [Ctrl]+[Shift]+[B] to build.
 This will produce the desired output and put it in a predefined location. Right click the Project and select ‘Open Folder in File Explorer’

In the bin folder, depending on your deployment settings (Debug/Release), you will find your assembly. Remember the location or move it to a known location. Issues can occur, if you register the assembly from the same location as you build.
Registering the Assembly with SSAS
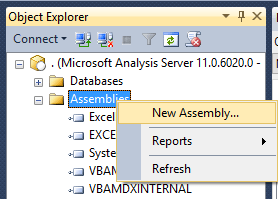
We begin by opening SQL Server Management Studio (SSMS) and connect to the server we want to test our custom code on. When connected, we can right click the Assembly collection and select to add a new Assembly.
 This opens a new dialog, in which we can specify different settings, most importantly the settings on security and impersonation. For details on this, please see this MSDN description. The different levels of permission settings:
| Permission Setting | Description |
|---|---|
| Safe | Provides internal computation permission. This permission bucket does not assign permissions to access any of the protected resources in the .NET Framework. This is the default permission bucket for an assembly if none is specified with the PermissionSet property. |
| ExternalAccess | Provides the same access as the Safe setting, with the additional ability to access external system resources. This permission bucket does not offer security guarantees (although it is possible to secure this scenario), but it does give reliability guarantees. |
| Unsafe | Provides no restrictions. No security or reliability guarantees can be made for managed code running under this permission set. Any permission, even a custom permission included by the administrator, is granted to code running at this level of trust. |
In my example, I will not have a dedicated account, which I would highly recommend, if you were to go into production with this.
I have selected the path where Visual Studio is configured to put the output, and I have selected Permission Setting Safe and I am impersonating the Current User.

When we click OK, the dialog will close, and the collection of assemblies ion the instance will be updated, to contain our newly created custom assembly.

Run the Query
The above steps enables us to query the function created, directly from MDX as shown in the screenshot below:

Note! The Assembly Name applied in the registration, is also the name I use in the MDX query. Had I named the Assembly MyFirstCode, the MDX would look like this:
 Think of this as an alias for the Class, the method name does not change.
Next steps
As described above, we can extend Analysis Services with all kinds of thinkable custom code. We can even send back parameters, in order to have some sort of context for the algorithm in question. We can of course also have multiple algorithms per assembly, allowing us to select specific ones, for each specific MDX query.
An assembly can, as shown above, be registered at the server level. But we can also register our assembly in the private assembly collection of any number of databases on the server. This allows us to differentiate the code base, based on the solution at hand.
Now, I am not saying custom assemblies are the solution to all of our challenges on the platform, but in the course of my career I have implemented a couple of solutions where I have used this technique. The end result was far more scalable, robust and better performing than the equivalent MDX voodoo it was set to replace.
![]()
Pingback: #SqlSatDublin (#SqlSat501) – ReCap | T-SQL.dk
Pingback: Testing Your #SSAS Cubes w/ Visual Studio – T-SQL.dk
Pingback: Speaking at Azure Birmingham UK User Group – T-SQL.dk