Recently I have unlocked a new and long-awaited achievement and I felt so happy about it, that I had to do a blog post on it.

I’ve known a couple of developers through my career, including myself, who was dreading the moment when they had to release/deploy a new version of the cube into production. In my experience, that all had root in the fact, that they (me included) had no idea if we would be able to run the process flawless, and as supposed. Typos would sometimes sneak in and crash the whole thing, an incorrect data connection would load data from the wrong source. Did we in fact deploy to the right server? Are we introducing breaking changes?
Sure, it’s easy enough when you only have a small server setup, but that’s where you plant the seeds to grow big. At that moment it’ll be a lot easier to implement semi- or even fully automated deployment frameworks.
I will here shortly describe some of the most obvious solutions of deploying new cubes to an environment, as supported by the product out of the box. Then I will sketch the latest introduction to our development pipe, continuous delivery. And just to be clear on concepts, it’s not continuous deployment, as that would require all builds to be published to production automatically. Not sure we will do that any time soon though.
Continuous deployment means that every change is automatically deployed to production. Continuous delivery means that the team ensures every change can be deployed to production but may choose not to do it, usually due to business reasons.
ref.: Wikipedia
Types of Deployment
XMLA
Late last year, I wrote a blog on how to Extract XMLA from SSAS Databases using PowerShell. But that is not the only way to get the code behind.
When browsing a server in SQL Server Management Studio (SSMS), you can right-click the database and select Script Database As. If you have a database in place already, in the new location, you would select Alter to, otherwise you select Create to. Obviously, when you want to delete a database, you select Delete to.

If you try to update an existing database with a Create to statement, you will be served an error message telling you that a database with that key already exists. You can manually change the Create statement to an Alter statement, no fuzz here.
Pros: You get to mess with XMLA?
Cons: The Database needs to be processed once the script has been executed. Huge impact to business users.
Synchronization
In a previous post of mine, I have written about how to synchronize a database from one server to another. I will not go into detail here, just refer to the post and highlight pros and cons.

Pros: Seamless to the end user (except cache clean-out), Easy to setup and manage.
Cons: Too slow, when databases become large.
Backup/Restore
The backup/restore approach is actually the last resort, as I see it. Once the restore process is kicked off, the business users are feeling the impact of the heavy process . You should avoid this. Depending on how your disk layout is, the pain can be avoided to some extend.
So, what needs to change?
None of the above mentioned scenarios appeals to Team Foundation Server (TFS) and in order to get into the no-sweat zone during release time, we need to build our deployments around TFS; The obvious choice when working with Microsoft.
Natively Visual Studio, or more precisely MSBuild, does not support dwproj files which are used for Analysis Services (SSAS) projects. So obviously this has to involve some kind of magic. But as it turns out, it’s not all that magic. However there is not much documentation on this particular scenario out there but I managed to find one good resource, which is this. It gave me just enough assistance to complete the task.
Depending on how high you aim, you can actually get quite far, with just a few simple tricks and some home-grown code. I will be doing this with Team Foundation Server (TFS), Visual Studio Online (VSO – see benefits here), along with some PowerShell to enable us to automatically deploy new SSAS solutions to specific environments.
In the early days of my career, right after I left Basic programming on my IBM XT (and then spend a good few years in the education system), TFS has always been a partner in crime for me. Both to secure my code, but also to manage releases. Back in those days it was called Visual Source Safe, which then turned into TFS, which is now also available as a hosted service, known as Visual Studio Team Services (VSTS). Even now a days I come across BI Developers who don’t know what TSF is, let alone a code repository, even veteran ones. I’d like for that to change.
PowerShell is free and so is VSTS, which means you can kick this off at almost no cost. How cool is that!?
Once you have your VSTS (get started here) in line and PowerShell available (get started here), you are ready to begin the automation process.
Three Steps to Success
- Install and Configure a Hosted Build Agent
- Create a Build Definition Locally
- Setup a Visual Studio Online Release
- Prerequisites:
- TFS License (hosted build agents are ~ $15 – source)
- Visual Studio Online Subscription (free)
- Visual Studio Data Tools (free)
Installing a Hosted Build Agent
- Log on to the computer where you want the agent to run
- Open TFS Web Access
- Click on Settings in the top right corner
- Click on project collection in the breadcrumbs
- Click on Download agent link to download .zip file with build/release agent in it. Right click on downloaded .zip file, click on Properties and Unblock the files if it is blocked.
- Make sure that you unzip the file into a folder that is not under your user profiles (for example, Downloads or Documents) or Program Files folders, because this will cause UAC to get in our way when a build job will try to call to build/release agent.
Configuring the Hosted Build Agent
- Open PowerShell (preferably as administrator), and browse to the folder where you unzipped the build/release agent
- Run ConfigureAgent.ps1 and follow the wizard
Creating a Build Definition
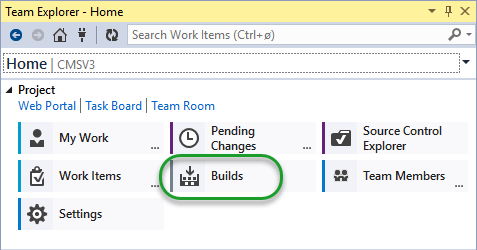
In Visual Studio, we open the Team Explorer Window ([Ctrl]+[½], [Ctrl]+[m]) and select the Builds sub menu.
Click New Build Definition
 This will open up a wizard, that will let you specify certain details on how the build should be executed.
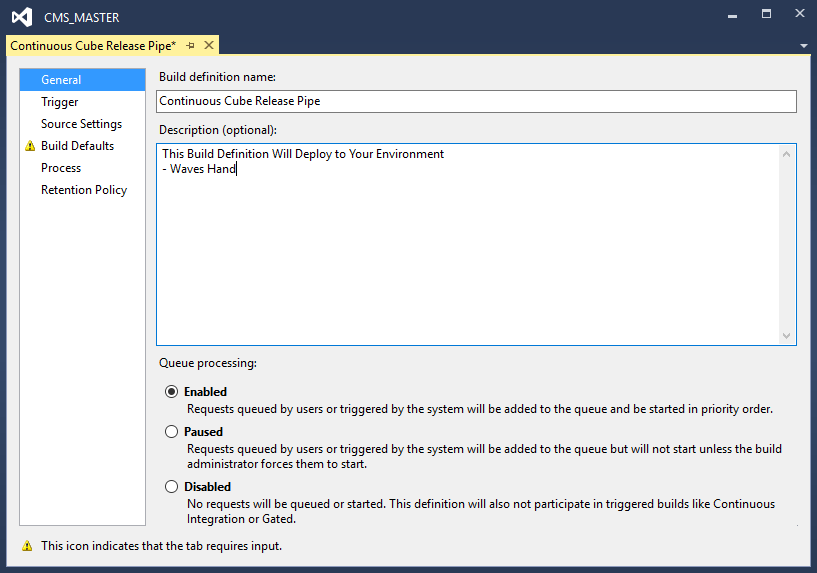
First up a name and description (and whether the build definition is active or not)
 Then we get to specify which triggering mechanism should fire off the build
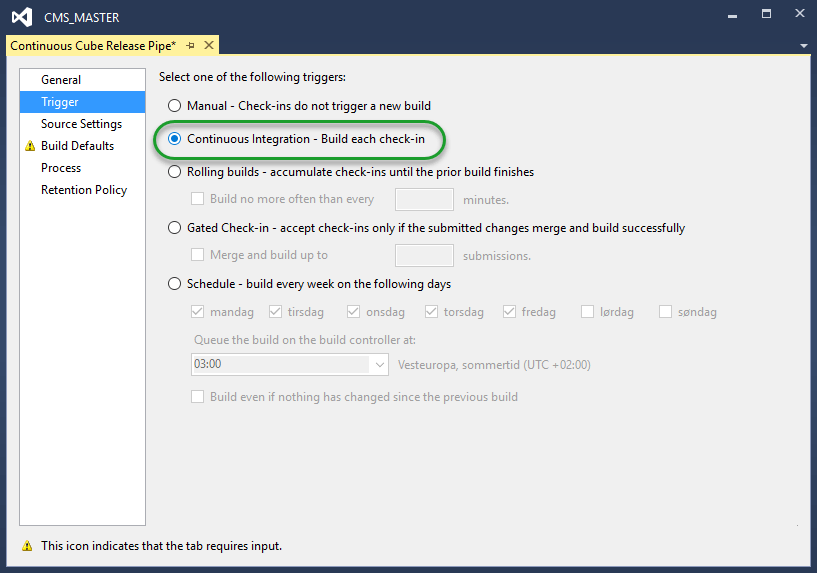
We select, in this example, Continuous Integration so that every check in generates a build. You can set this up as you see fit. There are a lot of options and I bet there is one fitting your requirements.
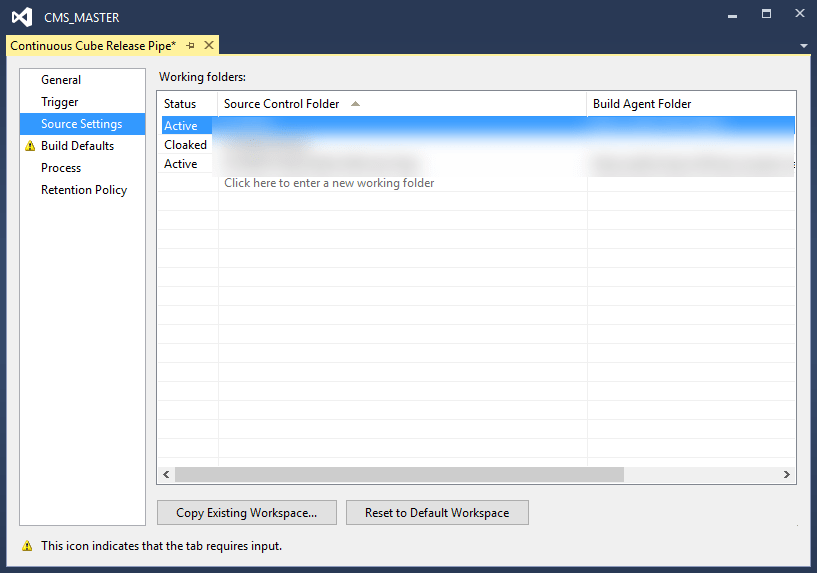
In the Source Settings tab you need to Map which source control folders you would like for the build to output. This is actually one of the steps that should refer to the card house in the beginning, as I am not quite sure how selective you can be nor how many options you have. If in doubt as me, just map the whole bloody thing!
The next step requires that you have set up the hosted build agent as described in the previous step – otherwise it won’t show up as an option. This is when you select your hosted build agent.
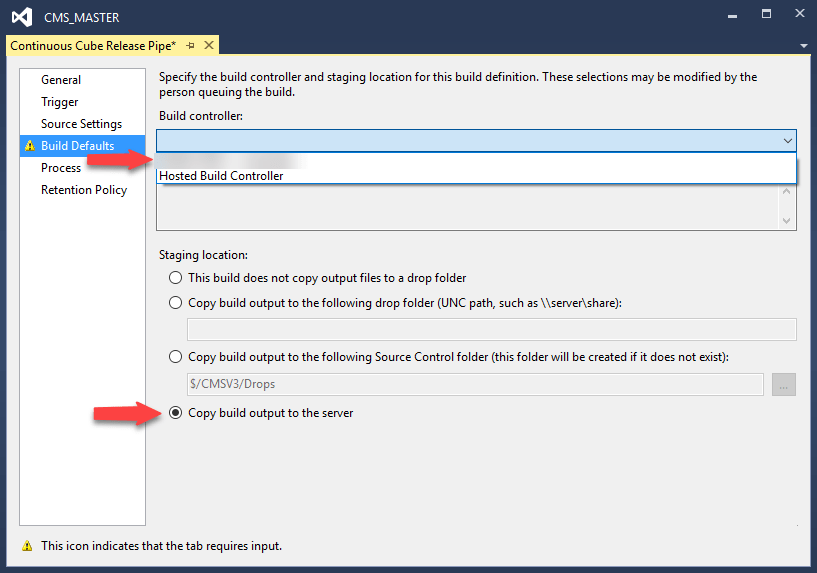 Remember to tick the ‘Copy build output to the server‘.
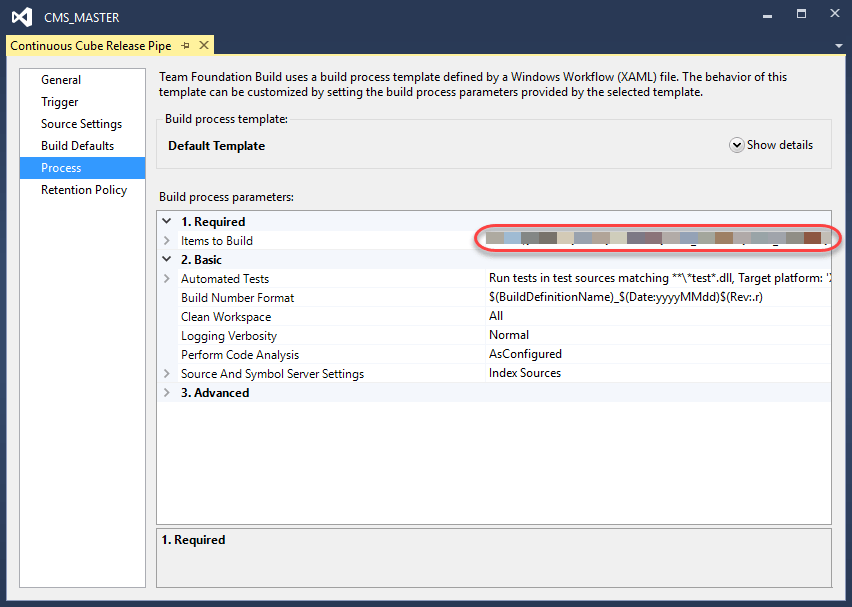
For Process, we select the most simple of the available process templates: Default Template. But, this is also the step where we customize our build definition to “support” our SSAS type project. In fact we will be building a regular .Net project. You can name this project file anything you’d like, it just has to have this following construction:
<Project xmlns ="http://schemas.microsoft.com/developer/msbuild/2003">
	<PropertyGroup>
		<Env>DEV</Env>
		<DeployFile></DeployFile>
		<SolutionPath></SolutionPath>
		<ProjectFolder Condition="'$(projectFolder)'==''"><INSERT PROJECT FOLDER HERE></ProjectFolder>
		<SsasVersion Condition="'$(ssasVersion)'==''">2016</SsasVersion>
	</PropertyGroup>
	<Target Name="BuildCube">
		<ItemGroup>
			<CubeProjectFiles Include="$(sollutionPath)\**\*.dwproj"></CubeProjectFiles>
		</ItemGroup>
		<PropertyGroup>
			<DevEnvTool Condition="'$(devEnvTool)'=='' AND '$(ssasVersion)'=='2016'">C:\Program Files (x86)\Microsoft Visual Studio 14.0\Common7\IDE\devenv.exe</DevEnvTool>
		</PropertyGroup>
	</Target>
</Project>
Place this project file next to your SSAS solution file, and point to that file in the Items To Build dialog in the Process tab.
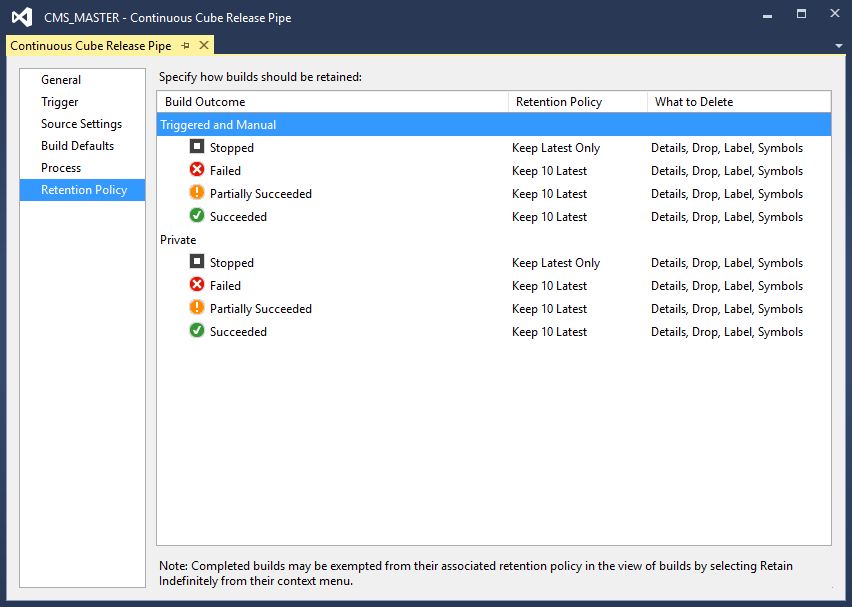
Finally is the Retention Policy, which is not something we change in this example. Basically it’s about how long the server keeps different outcomes of the build result.
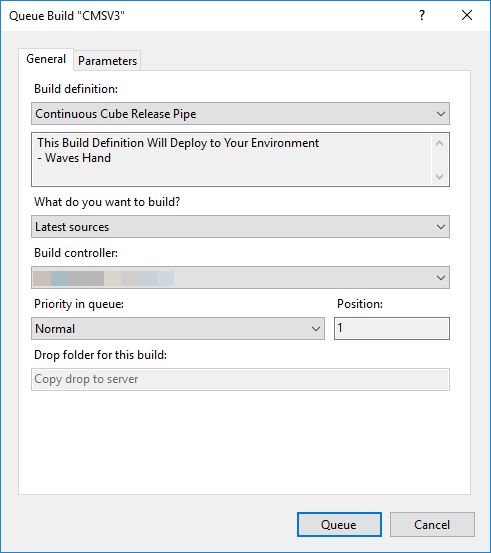
Once this is saved, you should be able to check-in any code change, and observe that the build is running. You can also set off the build manually, by right clicking and selecting Queue New Build.
And observe that the build is showing up as a job in Builds.
![]()
And finally, if we double click the job, we get the result of the build.
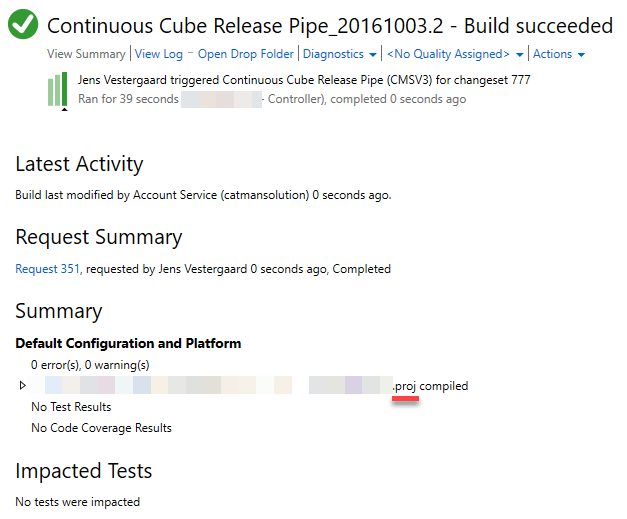
At this point, our code base is present on our Build Agent. This means, that if we want to do something with our code, we need to activate some scripts. Here is where VSO comes in handy.
Setting up a Visual Studio Online Release
If you do not already have a VSTS subscription, you can sign up for one, for free here.
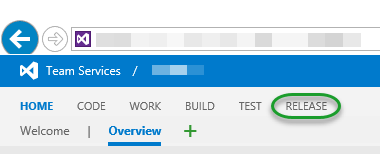
Provided you have set up your account as by the wizard above, you should be able to log into your account and select Release in the top menu.
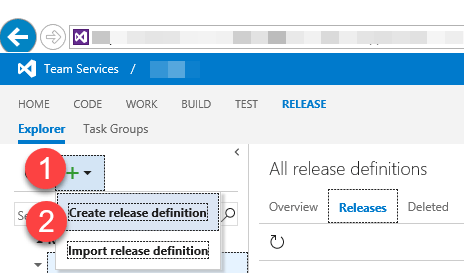
In the Release dialog, expand the + and select Create Release Definition.
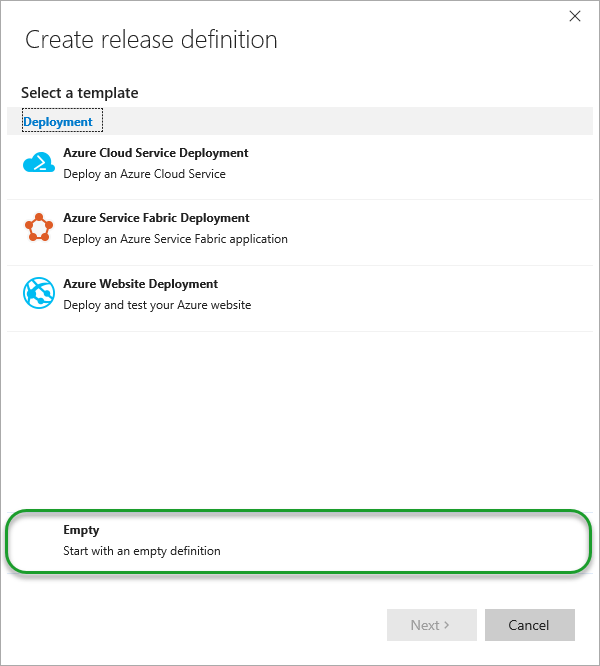
A new dialog will appear, and you need to select the Empty definition for the purpose of this example.
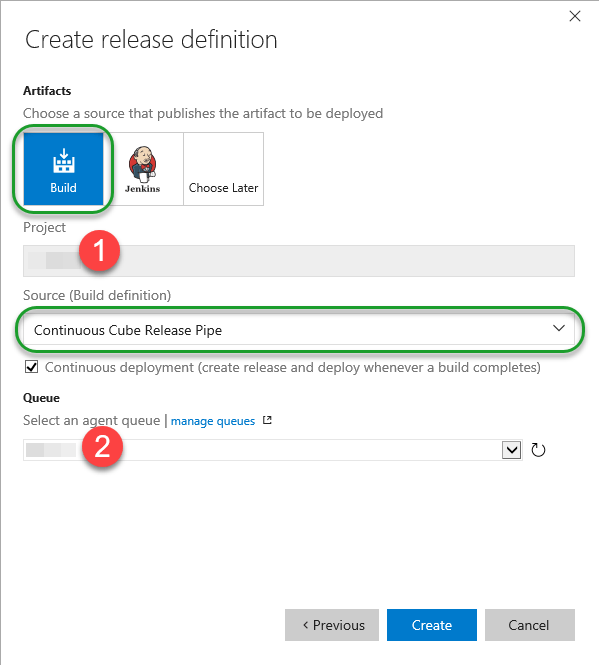
This will allow you to define the basics of the build, such as what type of build you’d use, whether it’d be Jenkins or MS Build or you can choose later on. Important here, is that you get to choose the Project from your TFS Collection that you would like to have build – marked 1. Also you need to select which build agent should be used with this particular build; Select the name of your hosted build agent here – marked 2.
You can the go rename both the environment and the definition to something more meaningful than New Empty Definition <Date> and Environment 1. Before we add tasks to the release definition, we need to link an artifact to the definition. We do so by clicking the Artifacts tab in the menu bar and select Link an artifact source. In the next dialog you need to select Team Foundation Version Control as Type followed by which Project, Source and Source Alias.
Remember to Save your work.
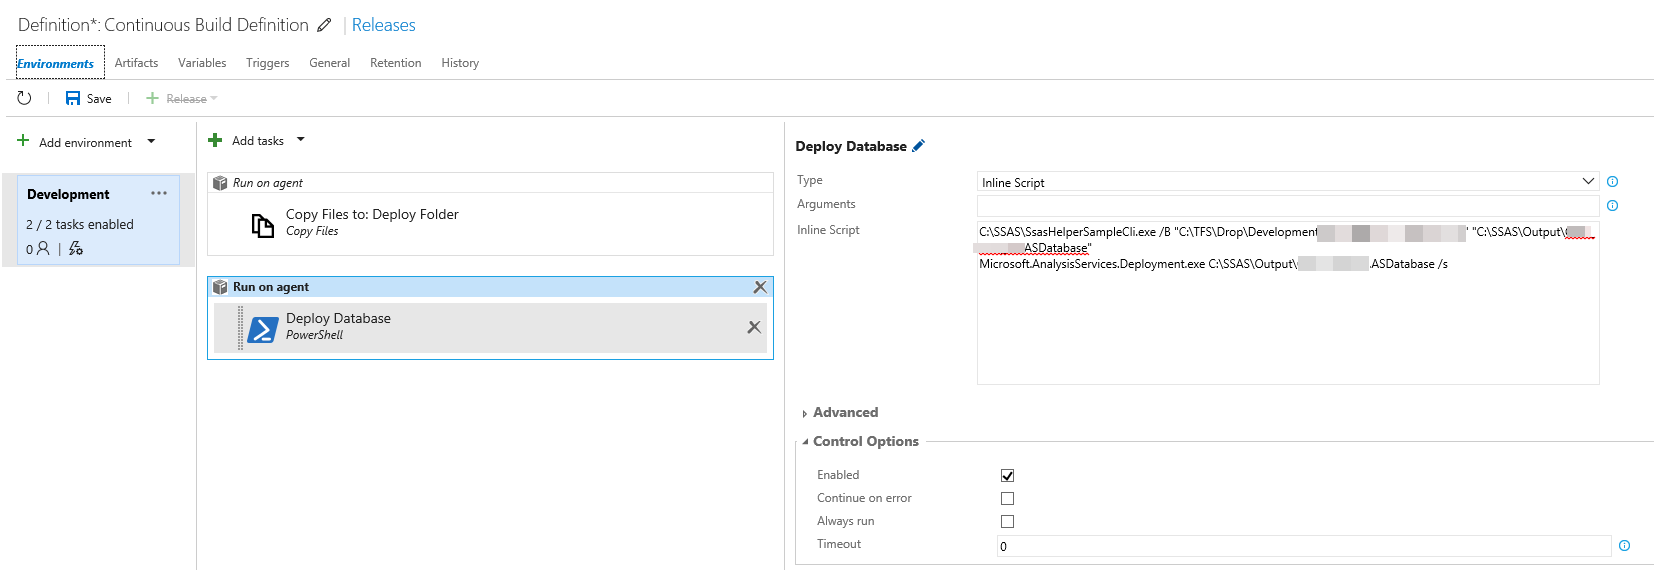
Once this has been completed, there are only a few steps left, before you have the loop closed. Now it’s time to put together some of the building blocks I have written about earlier. The Microsoft.AnalysisServices.Deployment.exe tool along with some PowerShell.
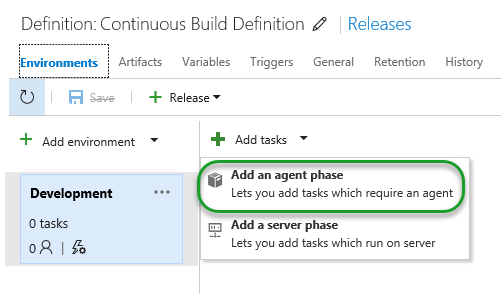
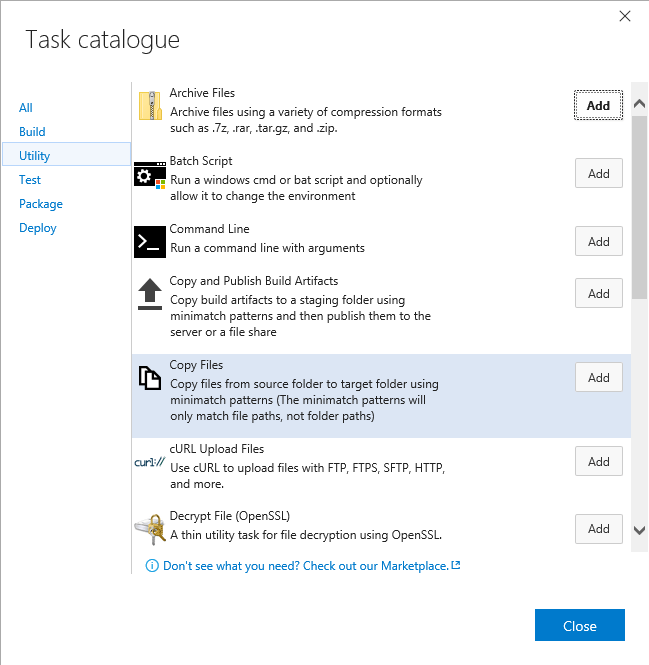
The first task we are going to add is to move the output of the build to another location on the server. This may not be completely necessary, but I like to separate duties. Basically we just copy the files to another folder.
Supply the Source Folder where the Build Agent drops the output of the build and specify the Target Folder and you are set to go.
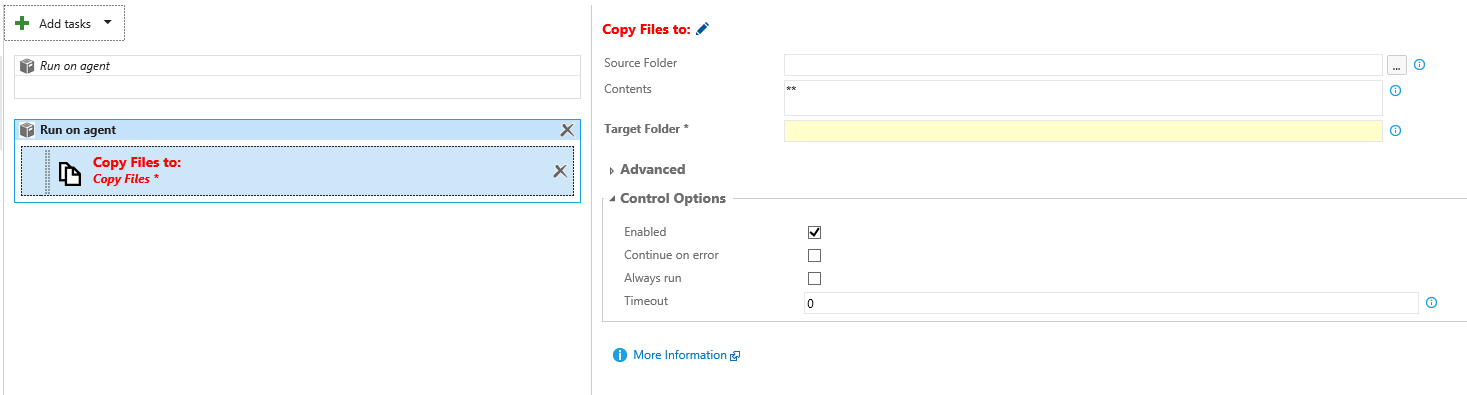
By running the Build Definition (not the Release Definition) you get to see where the Build Agent drops the files on your hosted agent. In the Source Folder of the Copy File(s) tasks you insert the folder containing the dwproj of your solution. Contents should be left ** and Target Folder should be set to some folder on the Agent Machine which you intend to use for deployment.
The last step is to use the SSASHelper and Microsoft.AnalysisServices.Deployment.exe tool to deploy the code just build onto an instance of Analysis Services. For this to run super smoothly, I recommend running the deployment tool manually the first time with the switch /a. This will run the utility in answer mode. All responses made during the wizard part of the utility should be written back to the input files, but no changes will actually be made to the deployment targets. If you choose, you can have the database processed as part of the deployment procedure or not; Depends on your requirements.
Note: This is where you specify which server the SSAS Project gets deployed to.
This means you get the parameters for your cube stored in files on disk, so you can deploy by those values every time, without having to do anything manually. Provided the tool has been run in answer mode, we can now add a task that will run the tool in silent mode with the switch /s.
Steps in script:
- Create .asdatabase from project using SSASHelper
- Deploy .asdatabase to instance using Microsoft.AnalysisServices.Deployment /s
Save you work, now 🙂
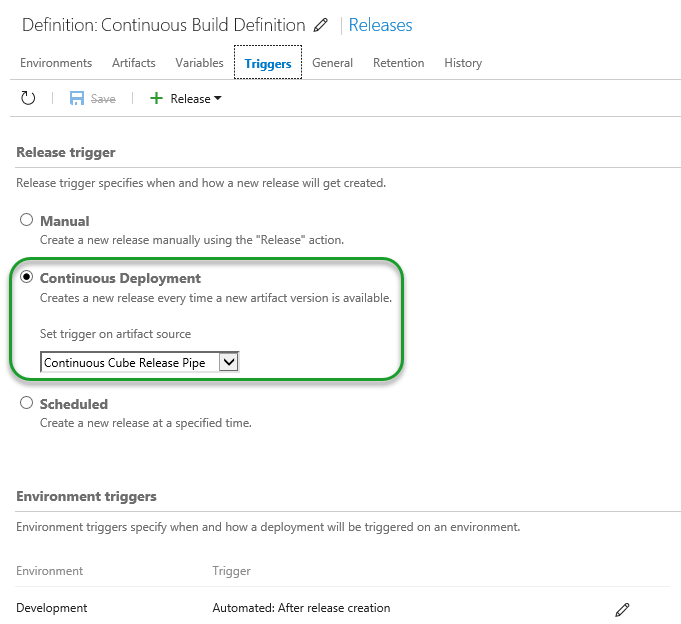
Verify that the Release Definition will actually fire, when the Build Definition kicks off. Do so by checking the Triggers tab.
Testing the Setup / Check-In
The next time you check change into TFS, your local Build Definition will kick off as will the VSO Release Definition, which in time will deploy the cube (processed or unprocessed) to your designated server.
Next step could be to synchronize the database from the staging area to test or even production. To do this you can set up a new environment in your TFS Release Definition and in this Environment, synchronize the database to the new location. You can even specify approvers to your environments, so that no steps are taken, until one or more people have signed off.
Final Thoughts
This may well be the longest blog post I have ever written. It is also the one task that have taken me the longest time to actually implement. The fact that I can now check in changes to TFS and behind the scenes our test environment is updated and prepared for test is a huge daily relief.
I will shortly try to add automated tests to the release process, and I will of course blog about it.
For me, this post sums up the steps of automating your daily/weekly update of your test environment; Something I haven’t been able to find anywhere else.
![]()

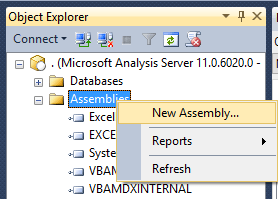
 Note that in the screen dump, there are no databases on the target server CMS01\SQL2016Prod but one on the CMS01\SQL2016 instance called Test Database. This is the database we are going to synchronize.
 When clicking next, you will be presented with a screen that allows you to select the location you want to synchronize to. Notice, that the folders available, are the folders set in the SSAS configuration attribute AllowedBrowsingFolders on the target server.
 In my case, both folders display: (default) – which means I haven’t set up anything special.
 In this case I have opted to just Copy All.
 We go with the Synchronize Now option and are presented with a Summary of our choices, just to make sure.


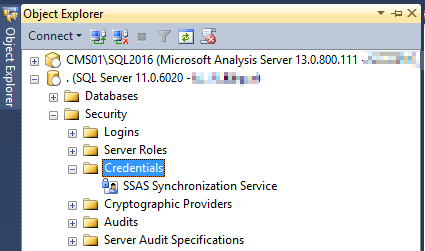 Having the Credentials ready, we can move on to create the Proxy that the SQL Agent Job uses.
 Setting up the Proxy is also very easy. Assign a name, Assign the proper Credentials and check the proper sub-system, in this case SQL Server Analysis Services Command .
 Maybe a bit misleading, but I have named both the Credentials and the Proxy the same. Once the Proxy is finished, it’ll appear in the Proxy collection in SSMS.
 We are then prompted to assign a name for the Job, and please do pick something meaningful and scaleable. I’ve seen tons of servers flooded with jobs named almost the same, only to differ in the post fix number. Bad Developer, No Twinkie!
 Obviously you would also fill in the description, as the above title should be accompanied by some more detail


 When right-clicking the newly created Job, I can choose to Start Job at Step – If more steps were present, I would be able to select a specific one. Since I only have one, the Job just kicks off.
 If the Green Success check mark fails to show, I bet you it has to do with the Proxy/Credentials. Please do re-check again with the requirements for synchronizing a cube, as stated initially in this blog post. Most often I found it’s down to lack of privileges.


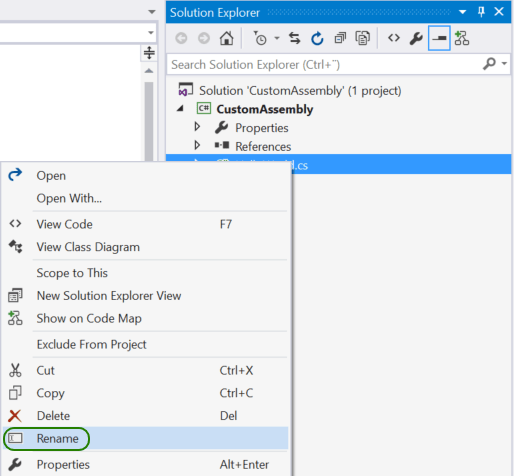 I have named mine HelloWorld.cs. With this in order, we are now ready to implement our custom code.
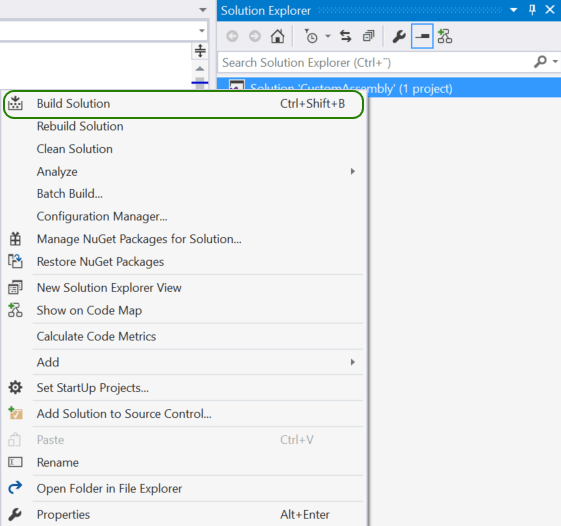 This will produce the desired output and put it in a predefined location. Right click the Project and select ‘Open Folder in File Explorer’
 This opens a new dialog, in which we can specify different settings, most importantly the settings on security and impersonation. For details on this, please see this


 Think of this as an alias for the Class, the method name does not change.
 And as we apply a Denied set, this will restrict the previous Allowed sub set, the intersection of the two sets, illustrated below: (The


 With this Empty Set ‘{}’ in place, we can browse the Allowed set again, but the Denied set does not restrict the result set.